
I stumbled across this old cabinet while exploring a milking shed on my parents’ farm. It was beaten up, covered in cow poo, and looked like it was destined for the dump, but for me it was love at first sight. I wanted to take it home, pretty it up with a lick of paint and some wallpaper, and fill it with tea cups and wine glasses and my good china (I don’t actually have good china, but I thought having a cabinet to keep it in would be an excellent reason to get some).

How hard can it be I
thought? I just need some sandpaper, paint, a weekend and a helper. My bestie K
seemed up to the task. Like me she could see beyond the poo covered exterior to
something beautiful beneath. It was decided then, we would have a fun weekend
restoration project to amuse us, just as soon as we found the time…
Weeks became months. K
decided to give away most of her worldly possession and move to Scotland. Every
time I parked my car in the garage there was the cabinet, staring at me
accusingly with its grubby yellow face, glass bubble eyes and flaking red
nose. It seemed destined to sit there forever. Enter Q, an everyday
MacGyver who is a wiz with a nail and hammer.
With neither of us realising the full extent of the project, he agreed to help
me restore the cabinet to its former glory.
While I love the finished
piece, I don’t want you to be under any illusions, there was a lot of work
invested in this project, and a lot of unplanned trips to Bunnings. However, it was an excellent couples building
exercise (read challenging) and has given me a wonderful sense of achievement. I
feel confident enough to tackle the many other furniture restoration projects I’ve
currently got on my ever growing to do list.
The Three P's of Restoration: Preperation, Preperation, Preperation
The first step involved
completely dismantling the cabinet. We soon discovered that not only was the
back of the cabinet damaged beyond repair, the shelves would need to be ripped
out and replaced too. The most time
consuming part of the process was removing all the nails and undoing the screws
holding on the hinges and catches. For some reason, perhaps to save time, each
hinge was attached with one screw and one nail which made them extra
challenging to remove.

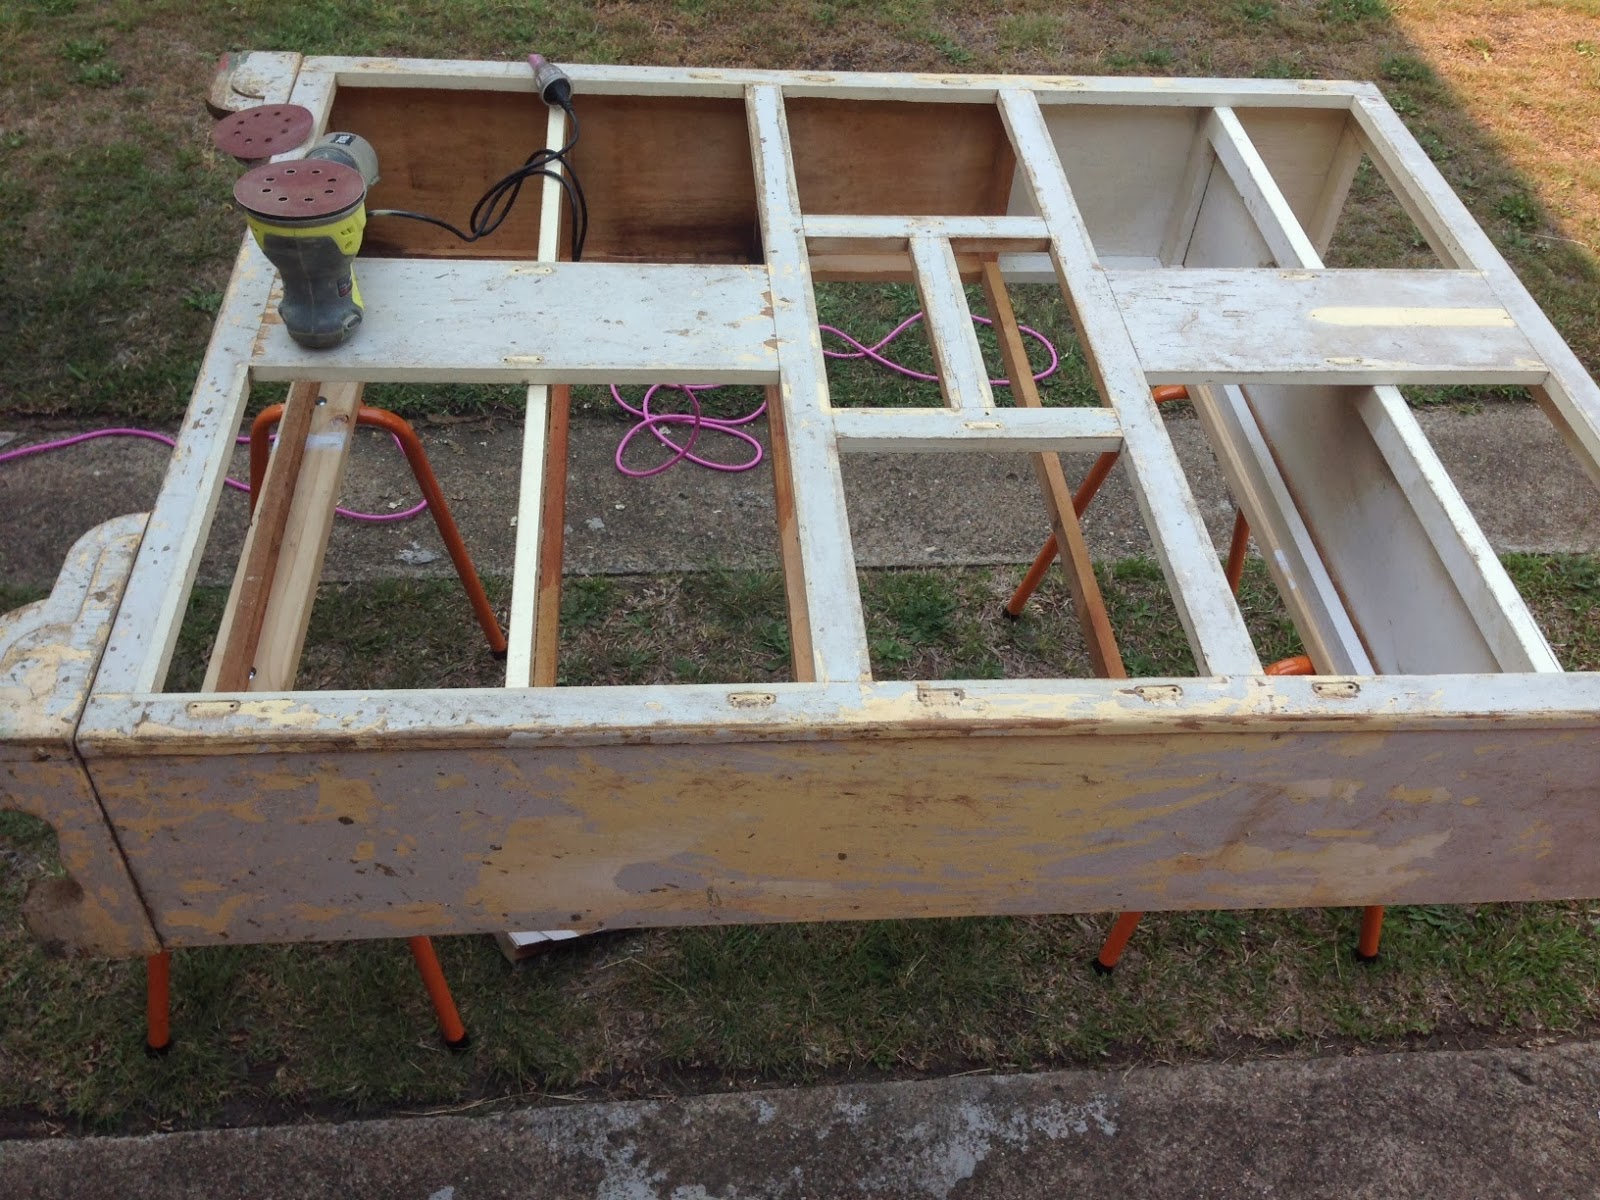
Next the sanding! This
took two full afternoons to do. We took the paint back to its original coat
with a random orbital sander (I really want one of these for my birthday!) This
was a messy job which we did in the front yard, and left us covered in yellow
paint dust, while sporting dust masks, safety goggles and ear plugs. We used
quite a fine grit sandpaper so not to damage the wood.
I was excited because I was sure it was finally time to paint now, and really we were almost finished then weren’t we? But no, first we had to fill all the cracks, chips and flaws with acrylic wood filler, as well as sanding the edges and corners and tricky bits by hand. We also had to cut the new shelves to size which we measured using the original shelves.
I originally envisioned
the cabinet with white gloss paint, blue trim, and white and blue wallpaper
lining the inside. However first we wanted to cover it in two coats of white
primer. We used Zinnser B-I-N white pigmented paint which contains shellac and
provides good coverage on wood. We applied it with brushes and it gave a nice
white antique effect. We liked it so much that we decided to do a final coat
with this instead of gloss paint, as we didn’t want it to look too ‘new’.

Finishing Touches
I’m a little ashamed to
say that we went on a bit of a hiatus after this. Getting to this point had
taken five full afternoons of about 6 hours each over our Christmas break.
However on and off over the next six weeks we chipped away at it slowly,
fitting the shelves, attaching the doors, fitting the beautiful catches and
installing the newly cut glass. A final paint touch up and it was finally ready
to heft upstairs! This was nerve wracking, after weeks of work I had images of
my beautiful cabinet tumbling down the front stairs, however we installed it in
the kitchen with no incidents. Then late on that Sunday night we cut and pasted
the wallpaper onto the back board (wallpaper is not fun to work with, I need to
remember this). At last at 9.30pm that night (big apologies to my housemate)
we nailed the back on.
There you have it! How to restore a cabinet in just six easy weeks. In case you want to take on a similar project of your own, I have included a list of all the materials and tools you will need. If you are considering restoring a piece of furniture I would recommend closely examining it for mould, water damage, any spills or stains, large cracks or warps in the wood. While restoring a piece of furniture is immensely satisfying, starting off with a piece which is structurally sound will make the whole process a lot easier and more enjoyable!
I would love to hear of others experiences with restoration projects! Are there any tips or advice you can share, or anything you wouldn't tackle again?

The Finer Details
Materials (all materials from Bunnings unless otherwise noted):
·
2 x 1L Zinnser B-I-N white shellac paint
·
House of York 'Pugin' wallpaper (Masters)
·
Shur-Stik wallpaper paste ( Masters)
·
3mm clear glass, unfinished edges (Archer Glass)
·
Sandpaper sheets x 5 (100-120 grit)
·
Sander pads x 15 (100-120 grit)
·
Bullet head nails
·
Screws
·
Hinges
·
Reproduction cabinet catches
(Ebay)
·
Acrylic wood sandable filler (white)
·
4mm MDF backing board
·
4mm marine plywood as shelves
·
8mm x 8mm square timber molding to hold in glass
·
3M ‘blue’ removable masking
tape
·
PVA aquadhere wood glue
·
Acrylic gap filler (caulk for window glass)
·
Methylated spirits
·
Chux cloths
·
Paint pots
Tools:
·
Claw Hammer
·
Assortment of screwdrivers
·
Chisel
·
Paint scraper / filler application blade
·
Razor blade holder to clean glass
·
125 mm random orbital sander
·
Tape measure
·
Saw
·
Assortment of G-clamps
·
Scrap timber to prevent damage during clamping
·
Pliers
·
Battery powered drill
·
4 x paintbrushes
·
Saw horses / tressels
·
Set square
·
Long ruler or straight edge
Wow that was quite a project! It looks like all of your hard work paid off - the cabinet looks fab! Well done :)
ReplyDeleteThanks so much for your kind words Kez!
DeleteTips or advice? Things that are covered in tractor oil and faeces take a long time to fix! :)
ReplyDelete